

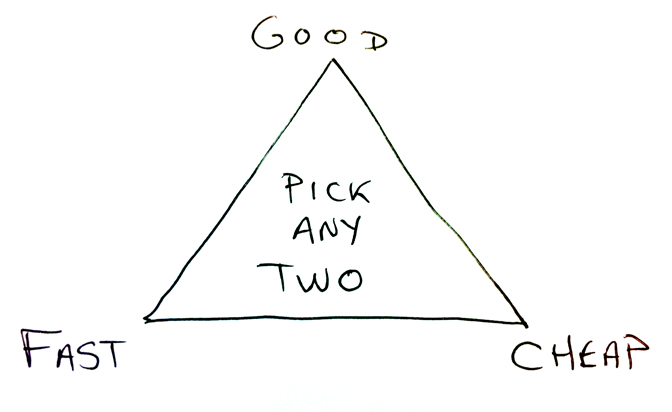
Motivation
Starting out in backpacking late in life, I came to the sport with a few pounds around the midriff, but also with a bachelor’s degree in Engineering, as well as enough ingenuity courtesy of the School of Hard Knocks. This provides the motivation for a solution that can be
- easily transportable, eg collapsible
- lightweight, and
- cheap,
knowing full well that achieving all three is a physical impossibility. What I’ve come up with what I believe a good compromise of these three properties, finding a sweet spot somewhere in the middle of the Triple Constraint Triangle. [more info]
List of Materials
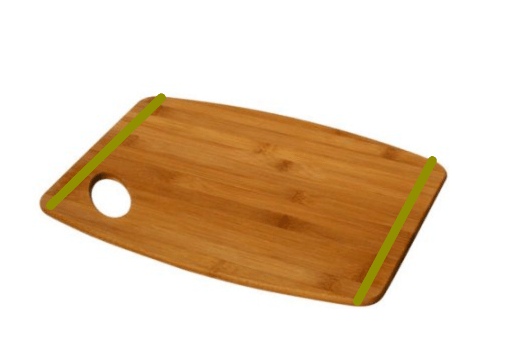
- A bamboo cutting board, 11″ x 15″, sourced from my local Walmart for about seven bucks. [sample]
- Two yard signs frames, sourced from my local Lowes for about two-and-a-half bucks. [sample]
- A length of about 10-ft of bank line, which I happen to have kicking around the house. [sample]
List of Tools
- A hacksaw such as this one with a blade for metal.
- A drill, with a 1/8″ bit.
- A marker.
- Some masking tape.
Procedure
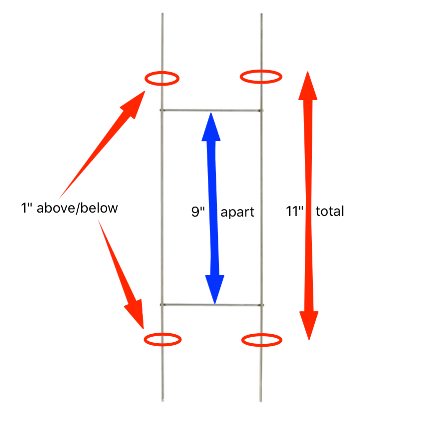
- Take the two yard sign frames and make a mark about 1″ above and below the cross bars. Because the crossbars are usually about 9″ apart, this gives a total length of about 11″ between the marks. Use the hacksaw to trim away the extra length from the yard sign.
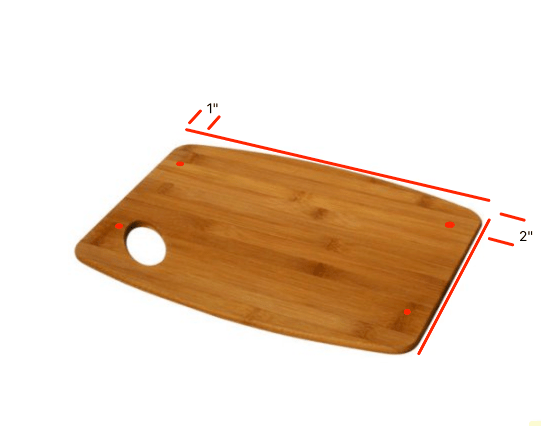
- Place a strip of masking tape to width-wise about 1-1/2″ from the edge
- Use the marker to put some ink on the newly made cut marks and press the edge of the frames onto the masking tape. This should transfer the ink onto the tape and give a guide for where to make drill marks. It should be somewhere around 1″ and 2″ from the corner.
- Drill away.
- Make a Bowline [how-to] on the bank line and wrap it around the “handle” of the board.
- Place the yard sign frame through the newly drilled holes and run the string through so that the tension tries to spread the legs out. Secure the line with a clove hitch [how-to] at each of the two posts. Run the line across length of the table, underneath makes the surface more usable, and repeat the cloves and wraps at the bottom.


